
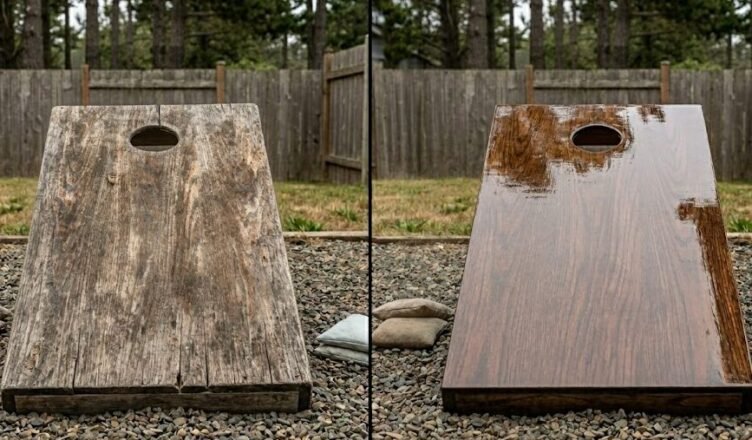
Cornhole Board Maintenance: How to Keep Your Boards Playing Like New
A quality set of cornhole boards can last a decade or more with basic care. Without it, even expensive boards can warp, crack, fade, and lose their playing surface in a single season. The difference between boards that age gracefully and boards that fall apart is about 30 minutes of maintenance a few times a year.
The good news: cornhole board maintenance is easy. You don’t need woodworking skills, expensive products, or a workshop. A few basic supplies and some common sense will keep your boards looking and playing great for years.
This guide covers everything from routine cleaning to full refinishing, plus how to fix common problems like warping, scratches, and peeling graphics.
Routine Cleaning (After Every Few Games)
This takes 5 minutes and prevents 90% of maintenance issues.
Wipe down the playing surface. Use a soft, dry cloth or microfiber towel to remove dust, dirt, and debris from the board surface after playing. This is the single most important maintenance habit. Grit left on the surface acts like sandpaper on your bags and gradually degrades the finish.
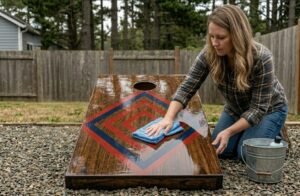
Spot clean when needed. For spills, mud, or stubborn dirt, dampen a soft cloth with warm water and a drop of mild dish soap. Gently wipe the affected area. The key word here is “gently” — don’t scrub aggressively or use abrasive pads, as they’ll damage the finish.
Dry immediately. After any wet cleaning, dry the board completely with a clean cloth. Water sitting on the surface can seep into the wood, causing swelling and eventually warping. Never leave boards wet.
What NOT to use: Avoid harsh chemicals, bleach, ammonia-based cleaners, pressure washers, or abrasive scrub pads. These will strip the finish, damage the wood, and ruin the playing surface.
Storage (The #1 Factor in Board Longevity)
How you store your boards matters more than any other maintenance step. Most board damage comes from poor storage, not from gameplay.
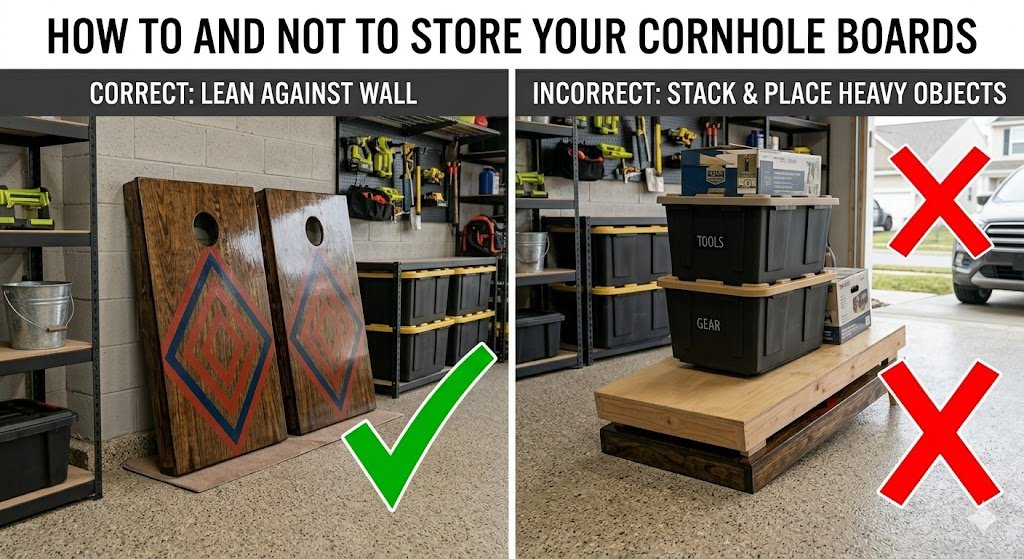
Store indoors. A garage, shed, basement, or closet is fine. The key is protection from direct sunlight, rain, and extreme temperature swings. Boards left outside will warp, fade, and deteriorate dramatically faster than boards stored inside.
Store flat or upright. Lay boards flat on a clean surface, or stand them upright leaning against a wall. Don’t stack heavy objects on top of them. If storing flat, keep the playing surface facing up so nothing scratches it.
Use board covers. Even in a garage, covers protect against dust, scratches, and accidental damage. Nylon slip covers are cheap insurance — $15-$25 for a set that extends your boards’ life significantly.
Avoid temperature extremes. Don’t store boards directly against an exterior wall in a non-climate-controlled space. Extreme heat causes the finish to soften and become sticky. Extreme cold can make wood brittle. A car trunk in summer is one of the worst places to leave boards — temperatures can exceed 150°F.
Keep boards out of prolonged direct sunlight. UV rays fade graphics, degrade polyurethane finishes, and dry out wood. Even through a window, consistent sun exposure over months will visibly damage boards.
Seasonal Maintenance (2-3 Times Per Year)
Twice a year (start and end of your playing season) plus once mid-season is ideal.
Inspect for Damage
Give your boards a thorough look-over:
- Surface scratches: Light scratches are cosmetic. Deep gouges that you can feel with your fingernail affect bag slide and need attention.
- Finish condition: Is the polyurethane still smooth and glossy? Or is it dull, chalky, or flaking? A degraded finish means the wood underneath is no longer protected.
- Hardware check: Tighten any loose screws on the frame and legs. Check that folding legs still lock securely. Loose legs create a wobbly board that shifts during play.
- Warping: Lay the board on a flat surface. Does it rock? Look along the edges — are they straight or curved? Slight warping can sometimes be corrected; severe warping usually means replacement.
Refresh the Playing Surface
If the finish is still intact but looking dull:
- Clean the surface thoroughly (see cleaning steps above)
- Lightly sand with 220-grit sandpaper — just enough to roughen the existing finish for adhesion. Don’t sand through the finish.
- Wipe away all sanding dust with a tack cloth or damp rag
- Apply one thin coat of water-based polyurethane with a foam brush or lint-free cloth
- Let it dry completely (2-4 hours minimum, overnight is better)
- Lightly sand again with 220-grit
- Apply a second coat
- Allow at least 24 hours of curing before playing
Which polyurethane to use: Water-based polyurethane is the standard for cornhole boards. It dries clear (oil-based yellows over time), dries faster, and has less odor. Rust-Oleum Varathane Water-Based Polyurethane in semi-gloss or satin is the most popular choice among cornhole players and builders.
Satin vs. semi-gloss vs. gloss: Satin provides the most natural look with moderate slide. Semi-gloss is the most popular — good slide, good looks. High gloss is the slickest surface but shows scratches more. Most players prefer semi-gloss.
Check out this YouTube video that takes you through the entire process. If you want to get deeper into any of the steps here, just search in YouTube and I promise you will find what you are looking for.
Fixing Common Problems
Scratches
Light scratches: Clean the area, lightly sand with 220-grit sandpaper, wipe clean, and apply a thin coat of polyurethane. Most light scratches disappear completely.
Deep scratches/gouges: Fill with wood filler, let dry completely, sand flush with the surface using 120-grit then 220-grit, and apply polyurethane. For painted boards, you’ll need to touch up the paint before sealing.
Peeling Graphics or Vinyl Wraps
If your board has a vinyl wrap that’s peeling, you have two options:
- Re-adhere it: Use a heat gun on low to warm the vinyl, then press it down firmly. This works for small areas but is usually a temporary fix.
- Remove and replace: Peel off the old wrap completely, clean the surface with adhesive remover, sand smooth, and apply a new wrap or simply paint/stain the boards fresh.
Direct-print graphics (the kind baked onto the surface) don’t peel. If a direct-print is fading, it’s usually UV damage — a fresh coat of UV-resistant polyurethane can slow further fading but won’t restore what’s already lost.
Warped Boards
Warping is the most frustrating board problem and the hardest to fix. It’s almost always caused by moisture exposure or storing boards in extreme heat.
Mild warping (slight rock on flat surface):
- Place the board on a flat surface with the concave (cupped) side facing up
- Lay damp towels on the cupped surface
- Place weight evenly across the top (cinder blocks, heavy books, etc.)
- Leave for 24-48 hours, checking progress
- Once flat, let the board dry completely and seal all surfaces with polyurethane to prevent future moisture absorption
Severe warping: Unfortunately, a severely warped board usually can’t be fully corrected. The wood fibers have permanently shifted. If the warp is bad enough to affect gameplay (bags slide unpredictably, board rocks significantly), it’s time for a new set. Check our Best Cornhole Sets guide or budget picks under $150 for replacements.
Prevention is key: Seal all surfaces (including the underside and inside the frame) with polyurethane. Warping happens when moisture enters from unfinished surfaces. Most manufacturers only finish the top — sealing the bottom and edges yourself adds significant warp resistance.
Loose or Broken Legs
Folding leg hardware takes the most abuse on any cornhole board. If legs wobble, tighten the carriage bolts and check that wing nuts are secure. Replace stripped bolts with slightly larger ones. If the wood around the bolt holes has cracked or split, reinforce with wood glue, let dry, and re-drill.
Full Refinishing (When Your Boards Need a Makeover)
When the finish is completely shot — chalky, flaking, uneven, or just ugly — it’s time for a full refinish. This is the cornhole equivalent of restoring furniture. It takes a few hours but gives you boards that look and play like new.
What you need:
- Orbital sander or sanding block
- Sandpaper: 120-grit and 220-grit
- Tack cloth
- Painter’s tape
- Paint, stain, or polyurethane (your choice)
- Foam brushes or lint-free applicator
- Well-ventilated workspace
Steps:
- Remove the old finish. Sand the entire playing surface with 120-grit sandpaper until the old finish is removed and you’re down to clean, smooth wood. An orbital sander makes this much faster. Sand with the grain, not against it.
- Smooth it out. Switch to 220-grit and sand the entire surface until it’s silky smooth. Wipe with a tack cloth to remove all dust.
- Apply your new finish. If painting, apply 2-3 thin coats of paint, sanding lightly (220-grit) between coats. If staining, apply stain per the manufacturer’s directions. If going natural, skip to polyurethane.
- Seal with polyurethane. Apply 3-5 thin coats of water-based polyurethane. Sand lightly with 220-grit between each coat. Use a foam brush and apply in smooth, even strokes. Don’t rush — thin coats that dry properly are vastly better than thick coats that bubble or drip.
- Cure completely. Wait at least 48-72 hours before playing. The finish may feel dry after a few hours, but full curing takes days. Playing too soon will mar the surface.
Pro tip: While you’re at it, seal the underside and edges of the board too. This prevents moisture from entering through unfinished surfaces, which is the primary cause of warping.
Bag Maintenance (While You’re At It)
Your bags need care too. Here’s the quick version — see our bag fill types guide for more detail:
Resin-filled bags: Rinse with water, air dry completely. Some handle a gentle machine wash. Replace when fabric thins or stitching loosens.
Corn-filled bags: Never machine wash. Spot clean exterior only. Air dry immediately if they get damp. Store in a breathable bag (not sealed plastic). Replace when corn breaks down and bags lose weight.
All bags: Store indoors between games. Inspect stitching regularly. Rotate between two sets if you play frequently to extend the life of both.
When to Replace Instead of Repair
Sometimes the right move is a new set. Replace your boards when:
- Warping is severe and can’t be corrected with the damp towel method
- The frame is cracked or splitting — structural damage can’t be reliably fixed
- The plywood top is delaminating (layers separating) — this is a material failure
- You’ve refinished 3+ times and the surface is getting thin
- You’ve outgrown your boards — moving from a budget set to ACL-certified boards is a worthwhile upgrade for regular players
Check our Best Cornhole Sets guide for our current recommendations, or our budget picks under $150 if you want a solid replacement without spending a lot.
Frequently Asked Questions
How often should I apply polyurethane to my cornhole boards? For boards played regularly (weekly), a light refresh coat once or twice a year keeps the surface in great shape. For occasional use, once a year or whenever the finish starts looking dull or chalky. Always lightly sand before recoating so the new layer adheres properly.
What’s the best polyurethane for cornhole boards? Water-based polyurethane in semi-gloss is the most popular choice. It dries clear, provides good bag slide, and is easy to apply. Rust-Oleum Varathane Water-Based Polyurethane is the most commonly recommended product in the cornhole community. Avoid oil-based poly — it yellows over time.
Can I use my cornhole boards in the rain? Brief exposure won’t ruin a properly sealed board, but don’t leave boards out in rain. Water seeping through the finish or into unfinished edges and undersides causes warping and wood damage. If boards get wet, dry them immediately and let them air out indoors before storing.
How do I prevent my cornhole boards from warping? Seal all surfaces — including the bottom, edges, and inside the frame — with polyurethane. Store boards indoors in a temperature-stable environment. Never leave them in a hot car trunk or outside overnight. Warping is almost always caused by uneven moisture absorption, so sealing every exposed surface is the best prevention.
How do I make my cornhole boards slide better? Clean the surface, lightly sand with 220-grit, and apply a fresh coat of semi-gloss or gloss polyurethane. A smoother, fresher finish creates better bag slide. Avoid wax-based products — they create an inconsistent surface that changes with temperature.
Need new boards? Check our Best Cornhole Sets for 2026. Want to protect your investment? See our Cornhole Accessories Guide for covers, cases, and more.
This post contains affiliate links. When you purchase through our links, we earn a small commission at no extra cost to you. For more details, see our Affiliate Disclaimer.